Xero Quick Start
1. Installation
- Install the Xero app from the Docusign App Center.
- During installation, grant the required permissions.
- After installing, click Connect Account to link your Xero organization.
2. Creating a Connection
-
You will be prompted to choose a connection type:
- Shared — accessible by the whole team (recommended).
- Private — accessible only by you.
-
Give your connection a clear name (e.g., "Xero Demo Company").
-
Log in to Xero to authorize the connection.
3. Creating a Workflow
- Navigate to Agreements > Workflows.
- Click Create Workflow to start building.
4. Available Xero Actions
The app provides three main actions to use inside your workflow:
- Read from Xero — retrieve data from the Xero system (e.g., Contact details).
- Writeback to Xero — update existing records or create new data in Xero.
- File Upload — attach a specific file (like a signed agreement) to a Xero Contact.
5. Important File Upload Configuration Nuances
- File Upload Location: When configuring the File Upload step, you must set the Drive to Contacts.
- How to set it: Click New Subfolder > Add Variable and select the ID retrieved from the "Read from Xero" step.
- New Sub Folder Variable: For the New Folder, you must use the Contact ID variable (not the name).
Known Behaviors & Limitations
This page covers important behaviors and limitations of the Xero integration in Workflow Builder that you should be aware of when building your workflows. Understanding these nuances will help you avoid common configuration mistakes and set up your workflows correctly from the start.
“OR” operator
The "OR" operator has important limitations:
- If the "IF" condition matches a contact → that contact is used
- If "IF" doesn't match → falls back to "OR" conditions, the first matched record is used
- If all "OR" conditions point to the same contact → works correctly
- If "OR" conditions match different contacts → the workflow fails with
400: "Found multiple records for the given search query". - If an "OR" field value is empty at runtime → the workflow will fail. Make sure all fields used in "OR" conditions are always populated. If a field might be empty (e.g., optional web form fields), avoid using it as an "OR" condition
Case Sensitivity
Although Xero itself is not case-sensitive when searching contacts, we recommend always using the exact name as it appears in Xero. This ensures consistent and predictable behavior across all workflow steps.
Special Characters in Contact Names
The following special characters are confirmed to work correctly in contact names: /, &, ', @, +, ,, ., -, ?, (, )
If a contact name contains other special characters not listed above, unexpected errors may occur. In such cases, please contact support.
1. Installation and Configuration
Prerequisites
Before starting, ensure that:
- You are logged in to a Xero account with the required permissions.
- You are logged in to a Docusign account with Admin rights to install and manage applications.
How to Install the App
- Open the Docusign App Center.
- Search for and locate the Xero application.
- Click the Install App button to begin.
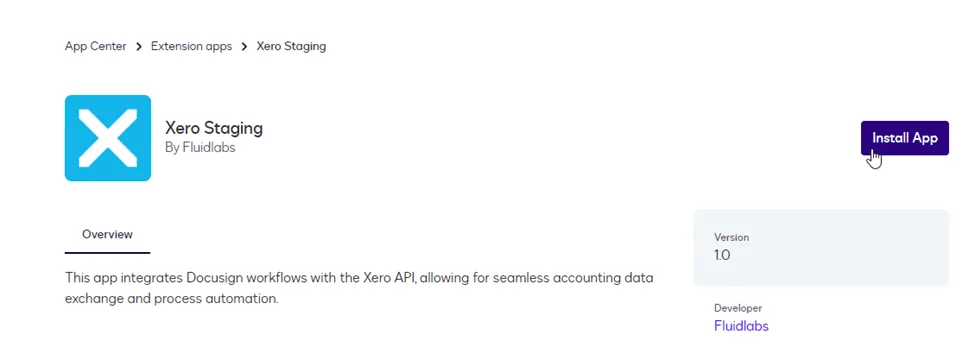
- During installation, grant the required permissions when prompted.
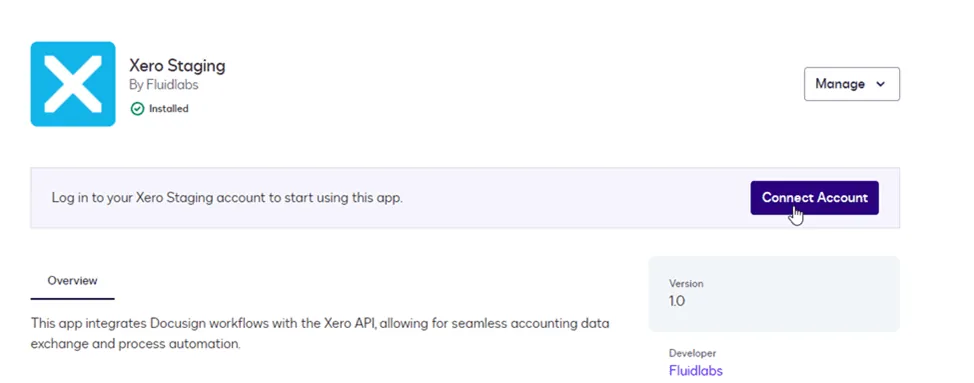
Connecting Your Account
Once the app is installed, you need to authorize the connection between Docusign and Xero.
-
Initiate Connection: After installation, click the Connect Account button on the app screen.
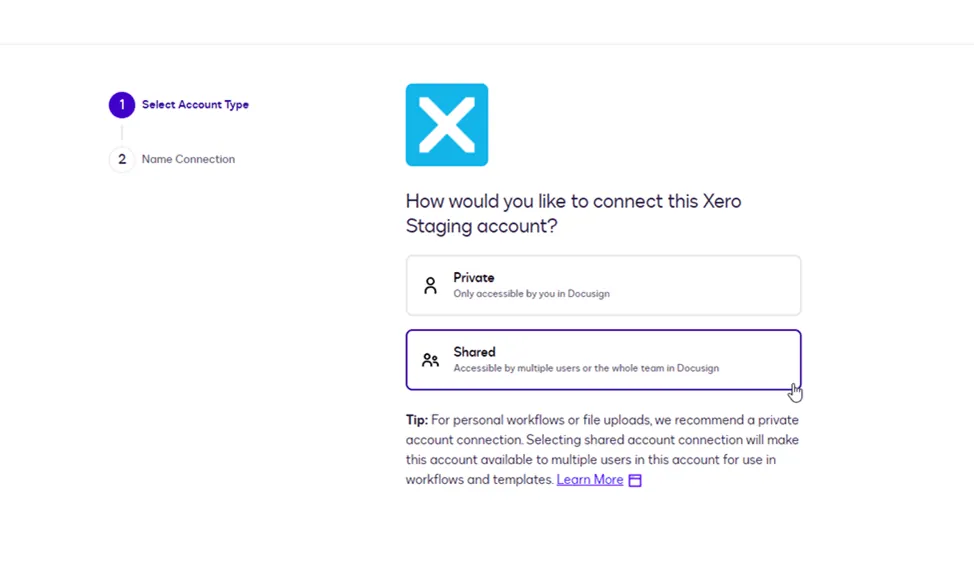
-
Select Account Type: You will be prompted to choose the connection visibility:
- Shared (Recommended): The connection is accessible by the whole team in Docusign. This is best for collaborative workflows.
- Private: The connection is accessible only by you.
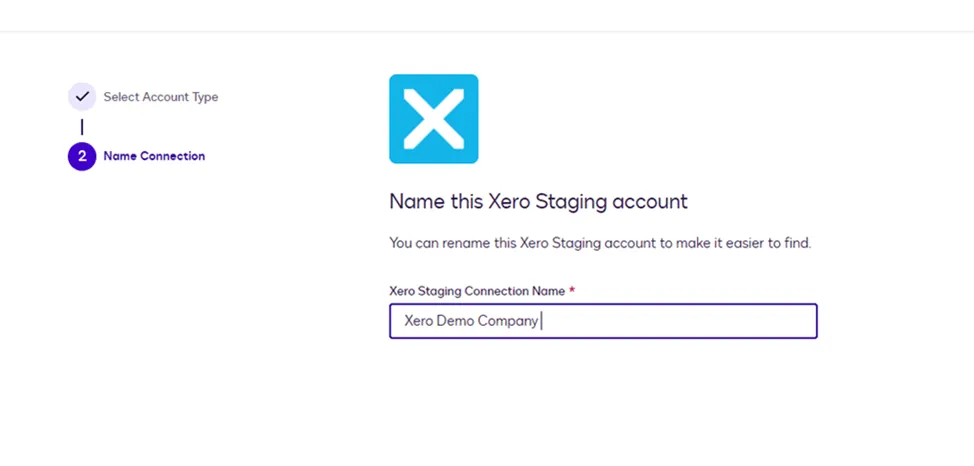
-
Name the Connection: Enter a clear name for your connection (e.g., "Xero Demo Company"). This name will be displayed later in Workflow steps, so make it easily identifiable.
-
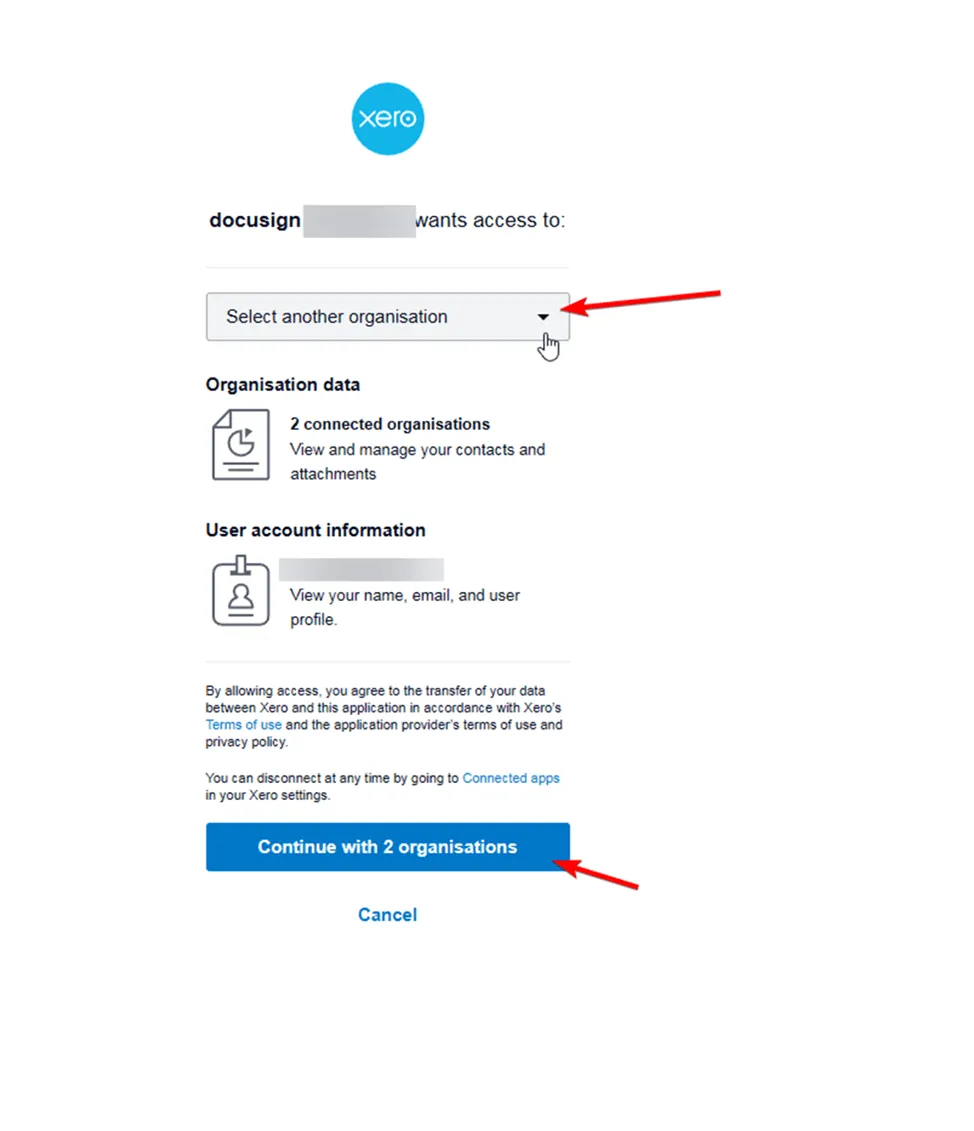
Authorize with Xero: Click Login to proceed to Xero.
-
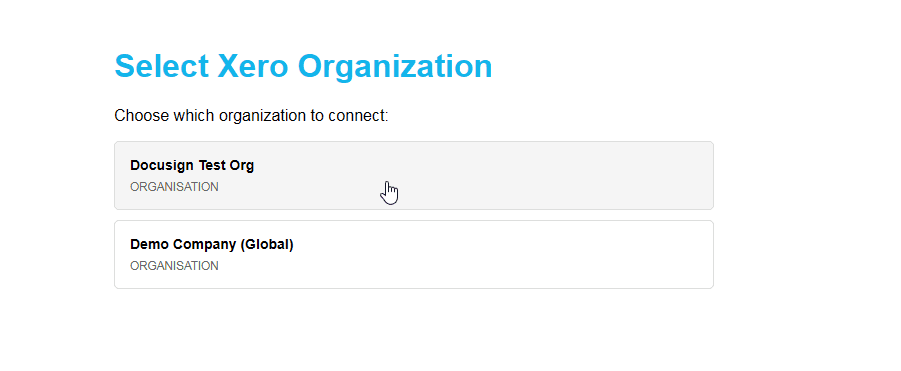
Select the organization you want to connect.
-
Troubleshooting: If you are already logged in and your organization appears "greyed out" or inactive in the list, click "Continue with [N] organisations" or select "Select another organisation" from the dropdown menu to re-authorize access.
-
-
Completion: You will be redirected back to the Docusign App Center. The app status should now show as Installed, and the connection is ready to use.
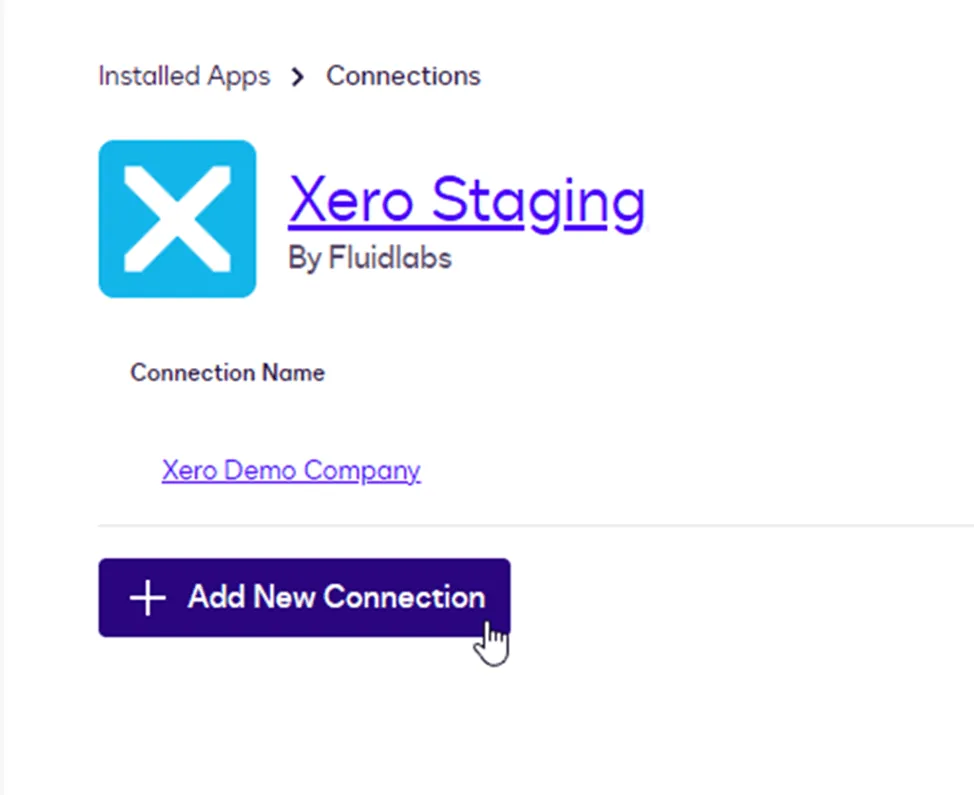
Managing Connections
You can edit, delete, or add new connections at any time without reinstalling the app.
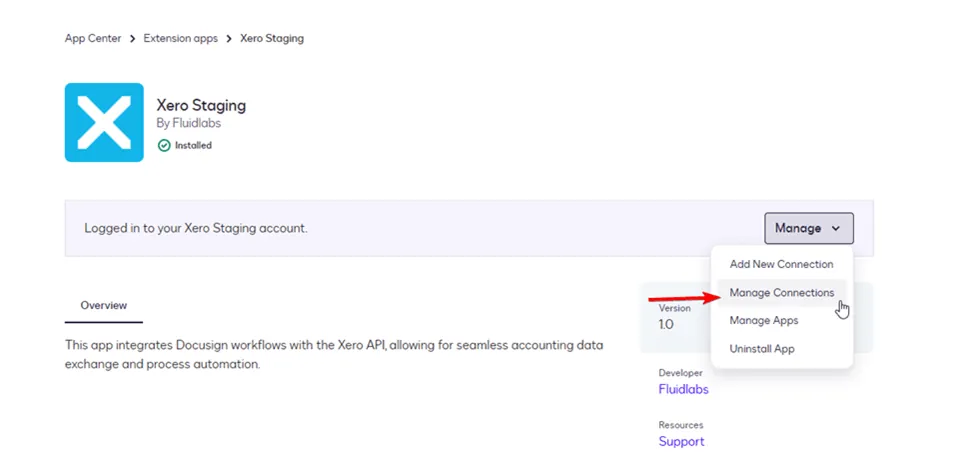
To access connection settings:
- Go to the Docusign App Center > Installed Apps.
- Find the Xero app and click the Manage dropdown or the three dots menu.
- Select Manage Connections.
Available Actions:
- Edit Name: Rename the connection for better clarity.
- Reconnect: Force a reconnection to refresh tokens or update permissions.
- Delete: Remove the connection (Warning: This may break workflows using this connection).
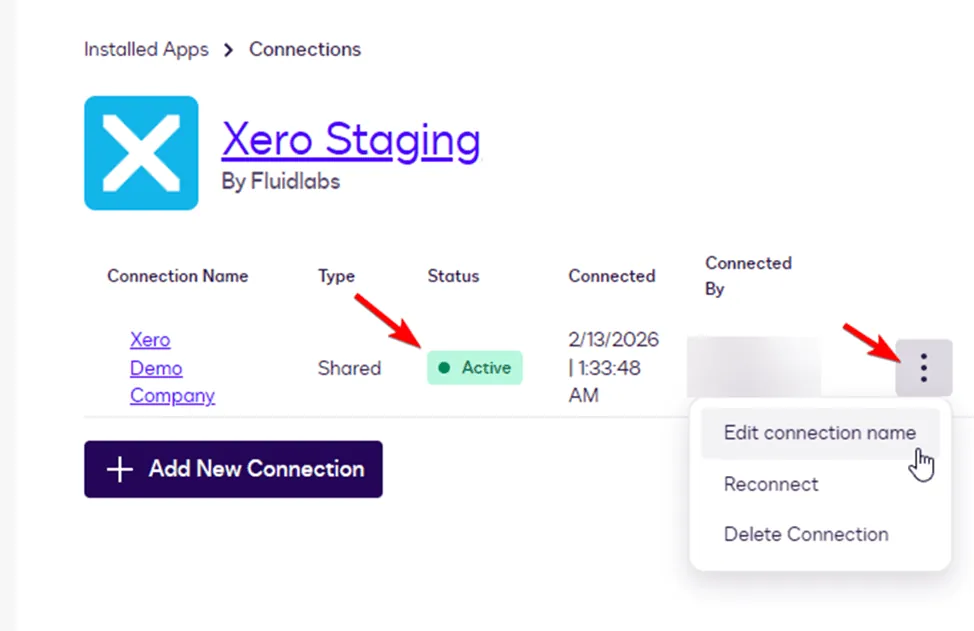
Adding a New Connection
If you need to connect to a different Xero company (e.g., for a different workflow), click + Add New Connection inside the Manage Connections screen. Follow the same setup steps as the initial installation.
2. How to Use the App
he Xero app enables you to work with Xero data directly within Docusign Workflows. Using this app, you can create workflows that read data from Xero, update Xero records, and automatically attach signed documents as part of an automated process.
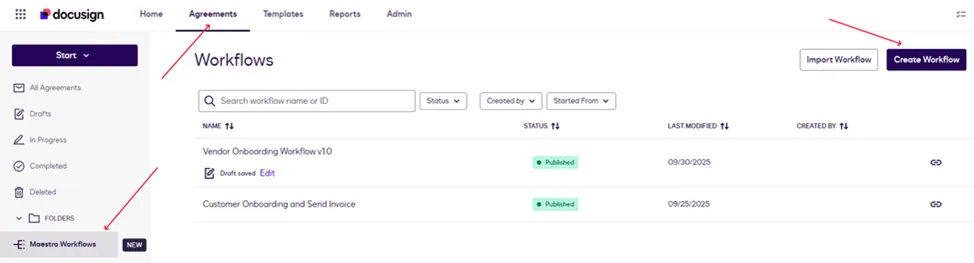
Create a Workflow Builder To start using the integration, you first need to create a Workflow in Docusign.
- Log in to Docusign.
- Navigate to Agreements → Workflows.
- Click Create Workflow.
- Build your workflow using the available steps, including Xero actions provided by the app.
- Publish the workflow when ready.
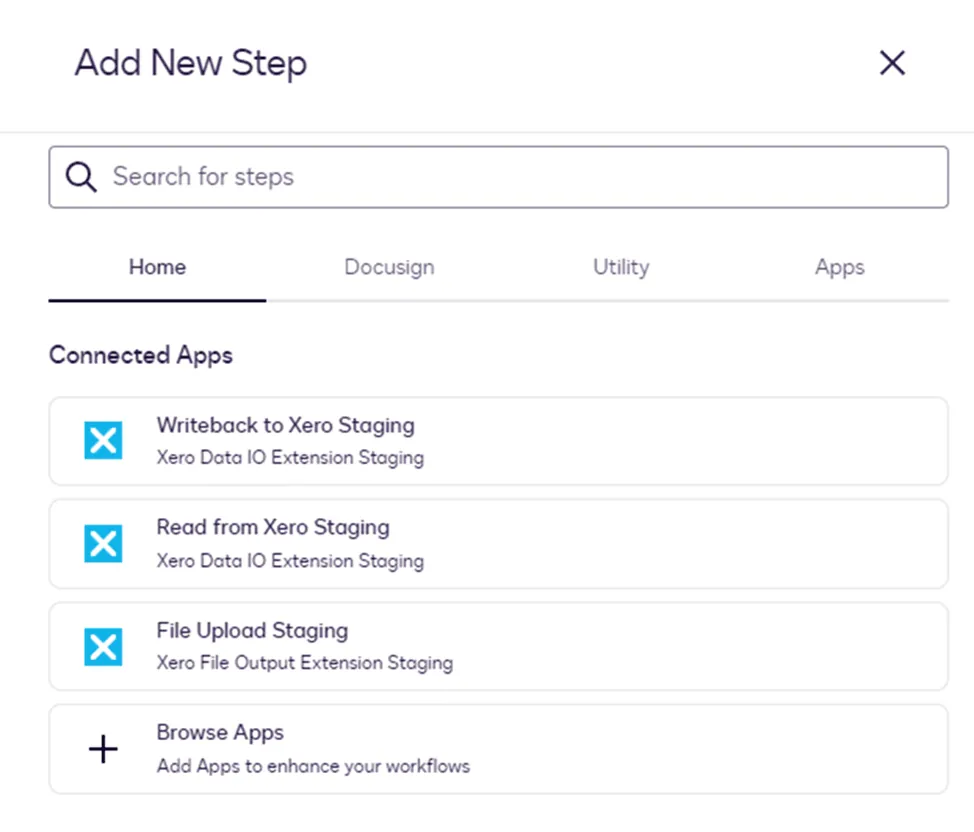
Available Xero Actions
Within the Workflow Builder, the Xero app provides actions to interact with your data. These actions allow Xero to act as both a source and a destination within the same workflow.
The following actions are available:
- Read from Xero: Retrieve data from the Xero system (e.g., Contact details).
- Writeback to Xero: Update existing records or create new data in Xero based on the workflow setup.
- File Upload: Attach a specific file (e.g., a signed agreement or W-9 form) to a Xero Contact.
Configuring Actions: Workflow Start
In this documentation, we will use object_id as the workflow startup variable. This is a common pattern when triggering workflows from an external system via API.
To configure the workflow trigger:
- Select From an API Call as the workflow start method.
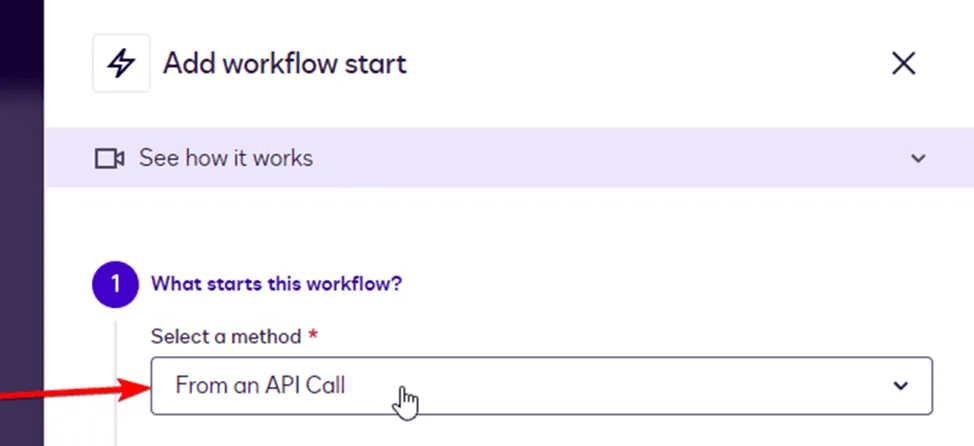
- Create a variable named
object_id(Type: Text).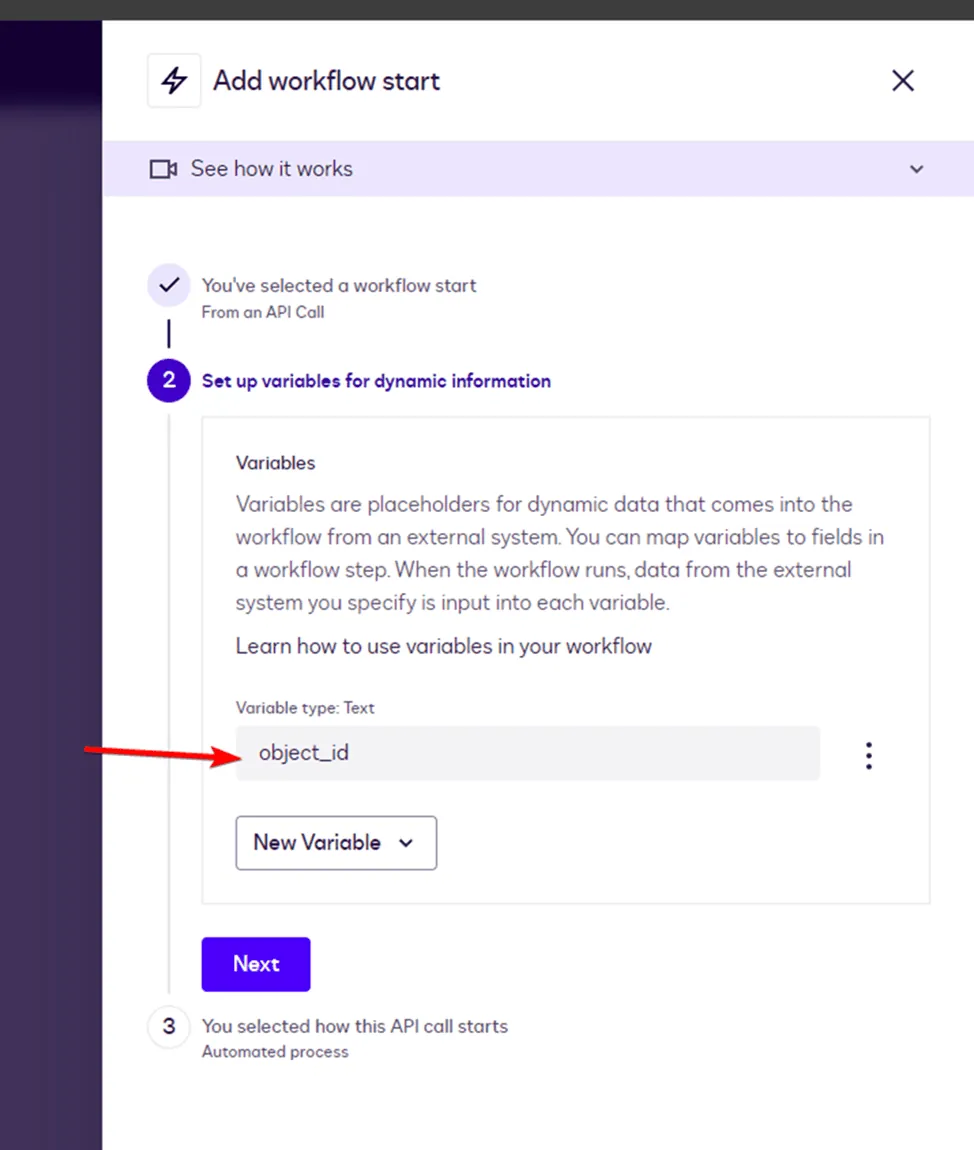
- Choose Automated process as the trigger type.
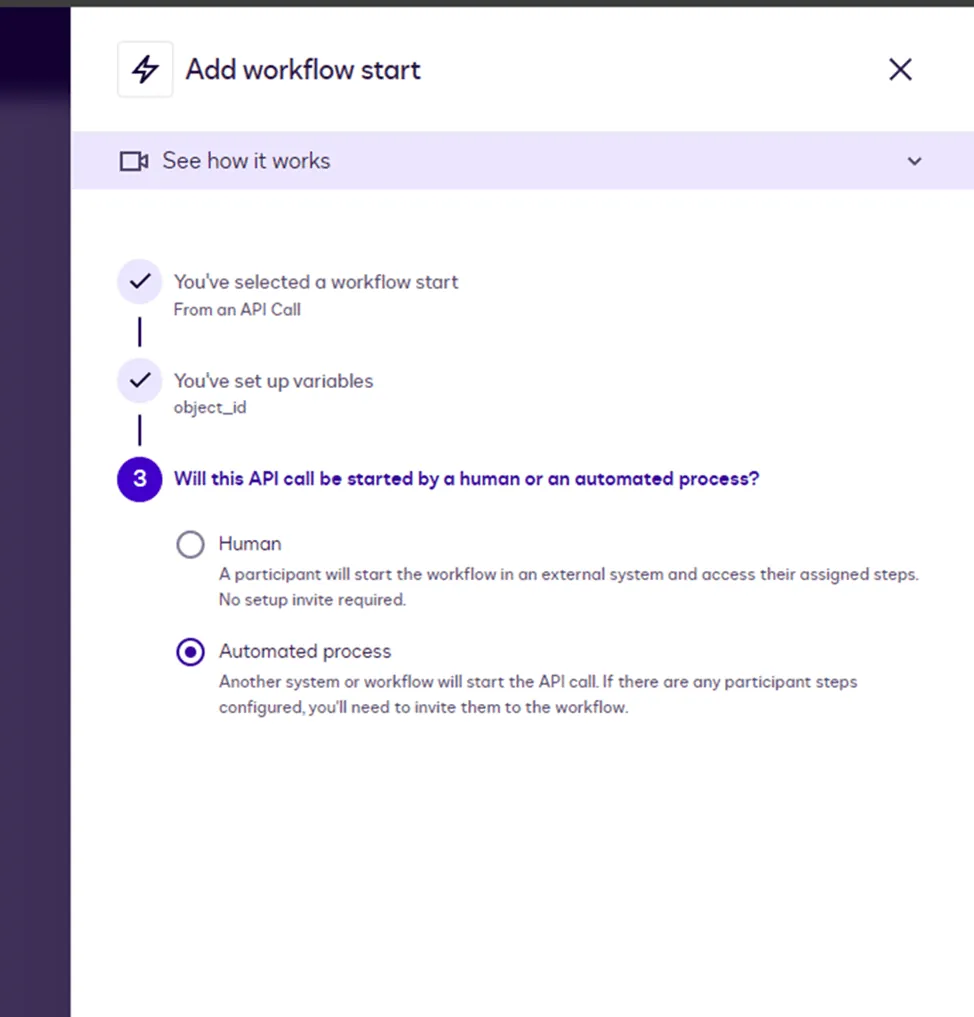
This configuration allows external systems to trigger the workflow and pass a specific identifier (like a Xero Contact ID) into the object_id variable. This variable can then be used in subsequent steps (like "Read from Xero") to identify which record to process.
3. Configuring "Read from Xero"
The Read from Xero step allows a workflow to retrieve data for a specific Xero Contact. To do this correctly, the workflow must be able to identify which Xero entity it should work with.
Step Overview
Configuring this step involves three main stages:
- Selecting the Xero connection and object.
- Choosing which fields to read (retrieve).
- Defining the rule to identify the target record.
1. Add the Step to Workflow
- In your workflow builder, click + Add Step.
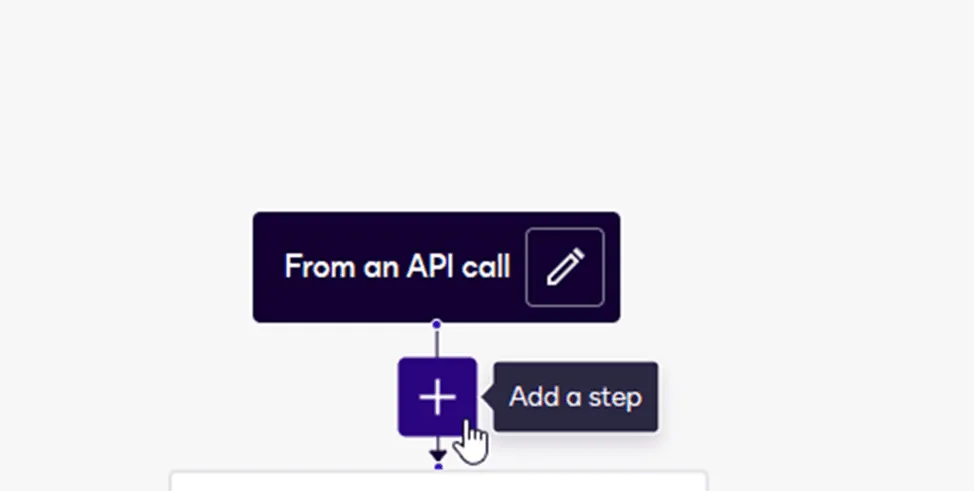
- Search for and select Read from Xero.
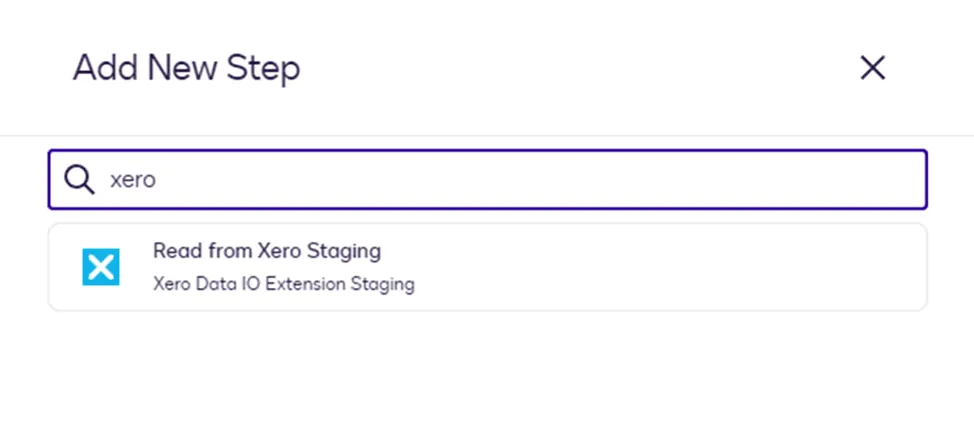
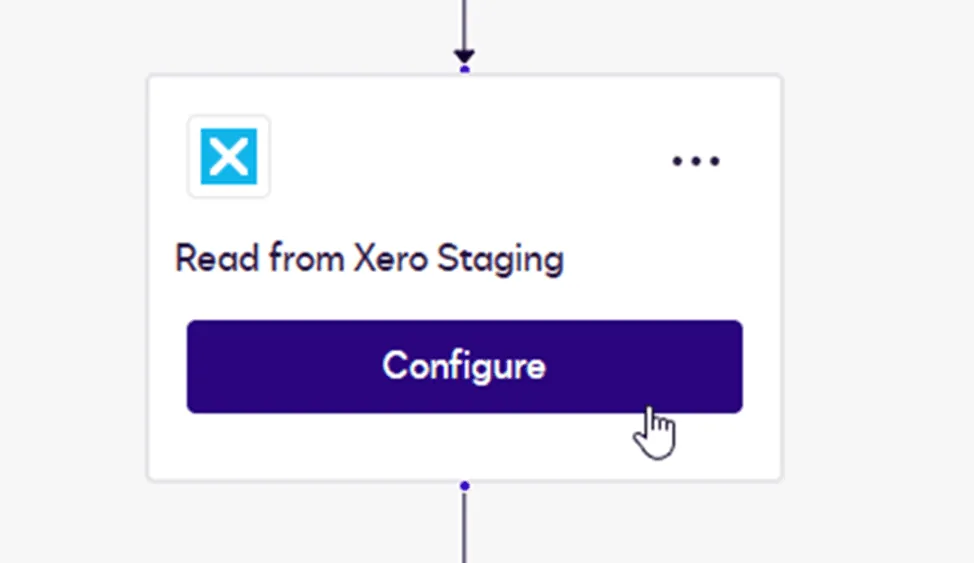
- Once the block appears, click Configure to start the setup.
2. Configure Connection and Object
You will be prompted to select where to read data from.
- Connection: Choose the Xero connection you created earlier (e.g., "Xero Demo Company").
- Object: Select the entity type you want to work with. In this example, select Contact.
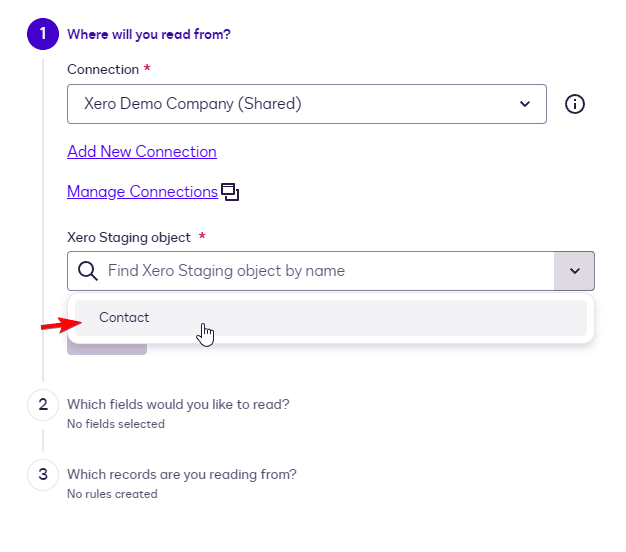
- Click Next.
3. Select Fields
Choose the specific data points you want to retrieve from the Xero Contact.
- Click Add or Remove Fields.
- Select fields like Name, Email Address, Contact Number, etc..
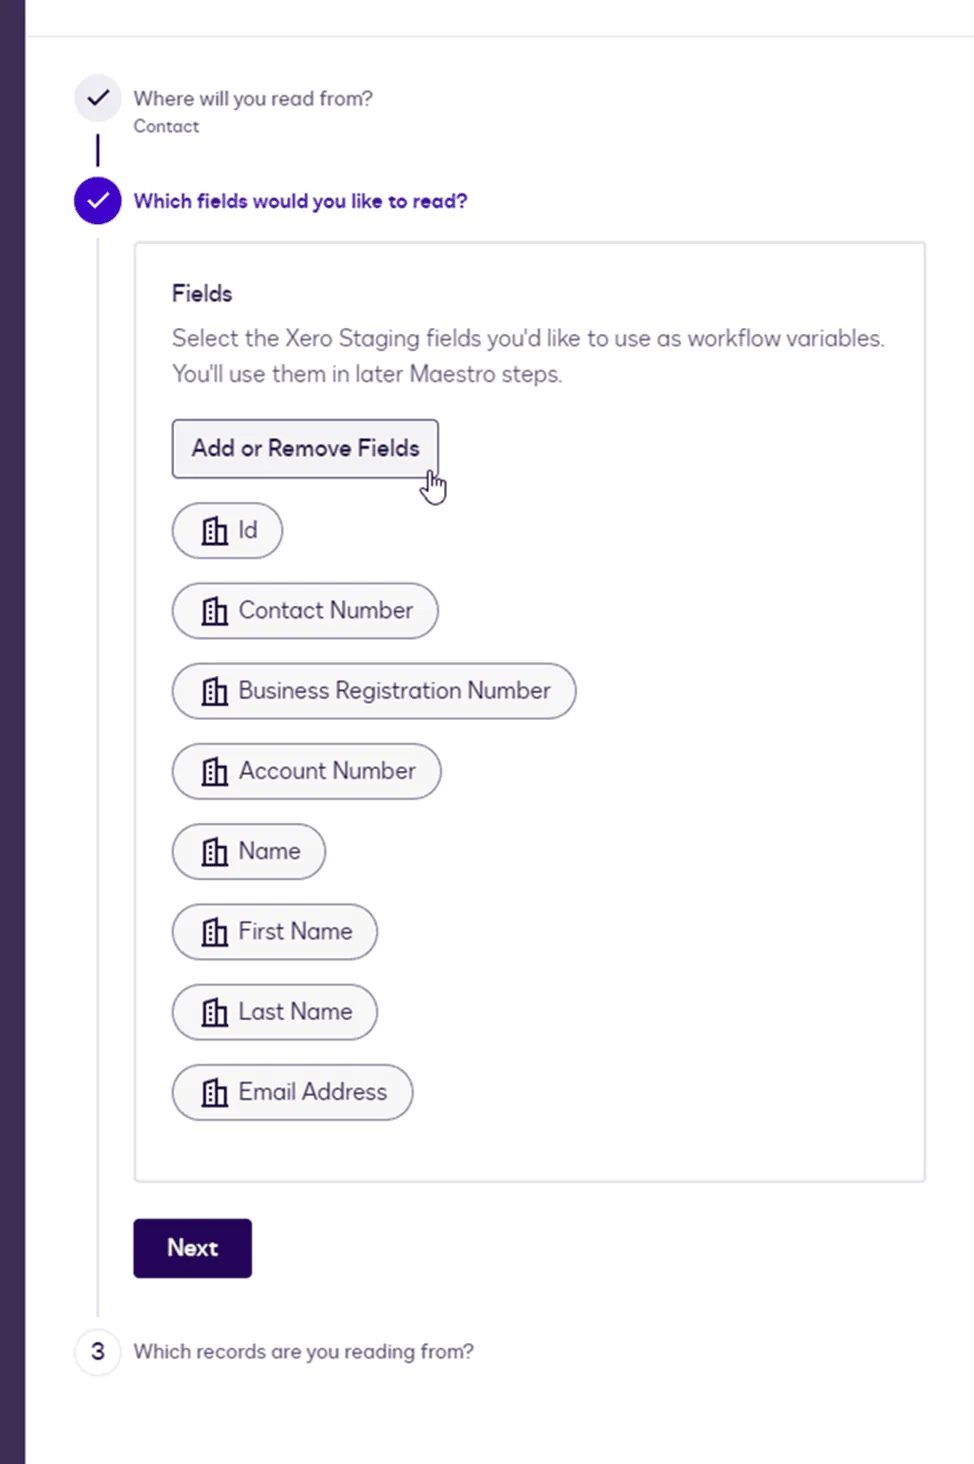
- These fields will become available as Workflow Variables for use in later steps.
- Click Next.
4. Identify the Record
In this step, you define which specific Xero record the workflow should read. You do this by creating a matching rule.
Create a rule that matches a Xero field to a workflow variable:
- Xero Field: Select a unique identifier field in Xero (e.g.,
Account NumberorContact ID). - Operator: Select
Equal to. - Workflow Field: Select the variable that contains the identifier (e.g.,
object_id, which we configured at the workflow start).
Example Logic: This rule tells the system: "Find the Xero Contact whose Account Number matches the object_id provided when the workflow started."
Note: You can use other fields for identification (e.g., Email, Name), provided they are unique enough to identify a single record.
Once configured, this step will find the correct Contact in Xero, and pull the selected data into the workflow. You can now use these variables (e.g., to pre-fill a document) in subsequent steps.
4. Configuring "Writeback to Xero"
The Writeback to Xero action allows a workflow to update existing Xero records or create new ones using data generated during the workflow execution (e.g., from a signed document or a web form).
Step Overview
This step is typically used at the end of a workflow to save results back to Xero. A common pattern:
- Read Client data from Xero.
- Send documents for signature using that data.
- Receive updated information from the signer.
- Writeback: Update the client record in Xero with the new data.
1. Add the Step to Workflow
- In your workflow builder, click + Add Step.
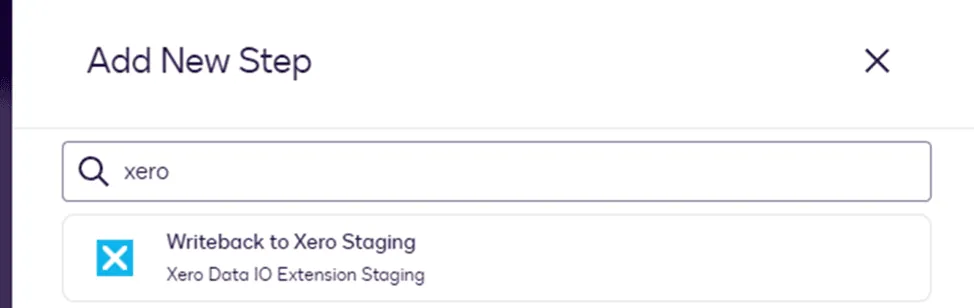
- Search for and select Writeback to Xero.
- Click Configure to open the settings.
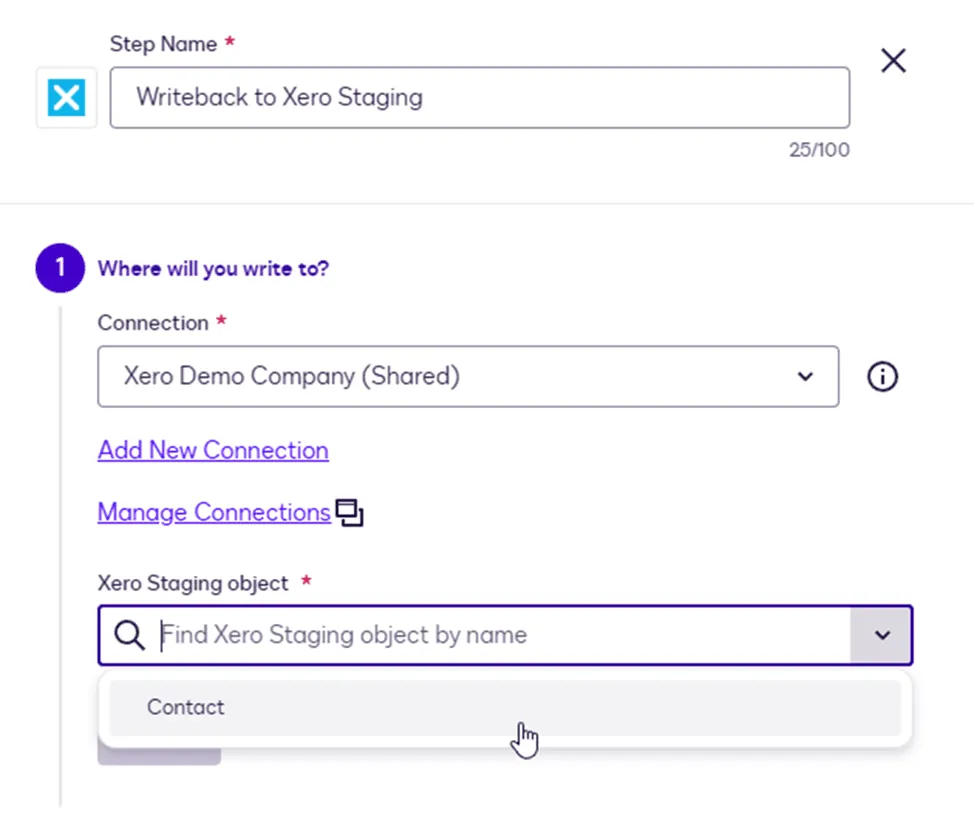
2. Configure Connection and Object
- Connection: Select your Xero connection.
- Object: Choose the entity you want to write to (e.g., Contact).
3. Choose Write Settings
Decide how the system should handle the data writing process:
- Update: Updates an existing record. Fails if no matching record is found.
- Create: Always creates a new record regardless of whether one already exists.
- Update or Create (Recommended): Smartly checks if a record exists. If yes, it updates it; if not, it creates a new one.
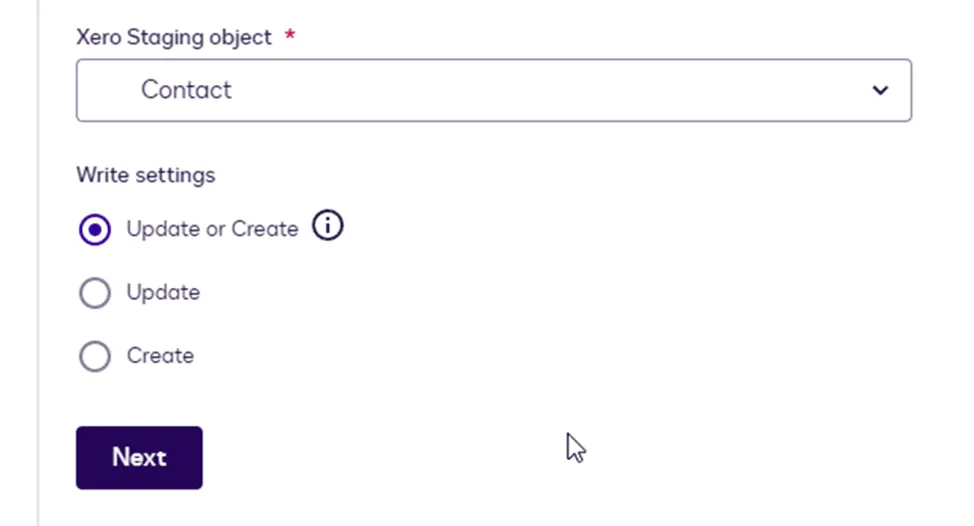
- Click Next.
4. Map Fields
Select which fields in Xero you want to populate with workflow data.
⚠️ Important: The Name field is mandatory in the Xero API. It is the key field used to find or create records.
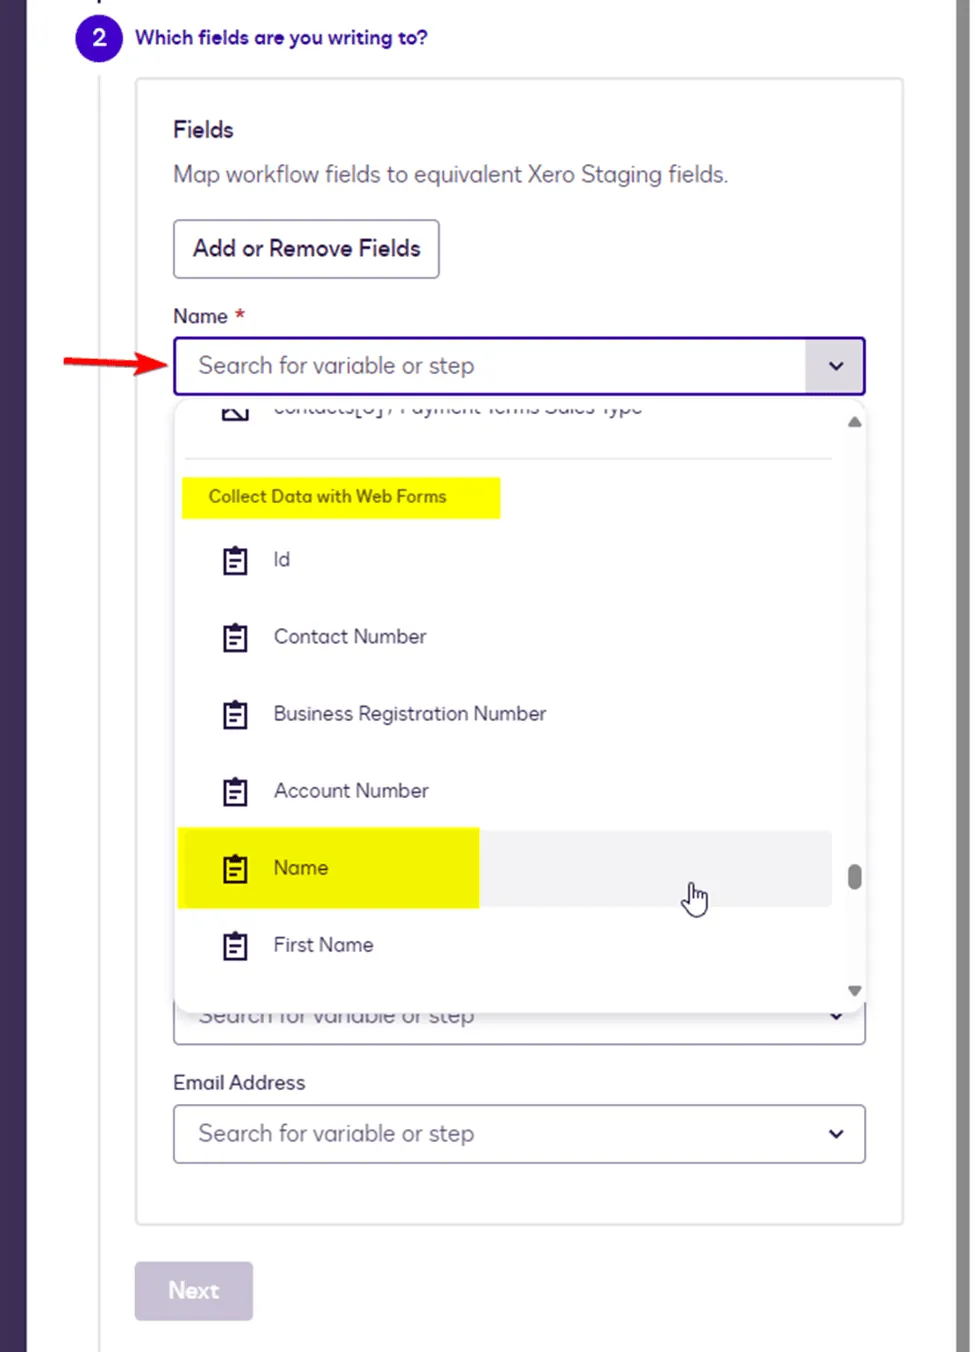
- Map the Name Field: Ensure you map the Xero
Namefield to a valid workflow variable (e.g., a "Name" field collected from a Web Form or theNamevariable from the Read step).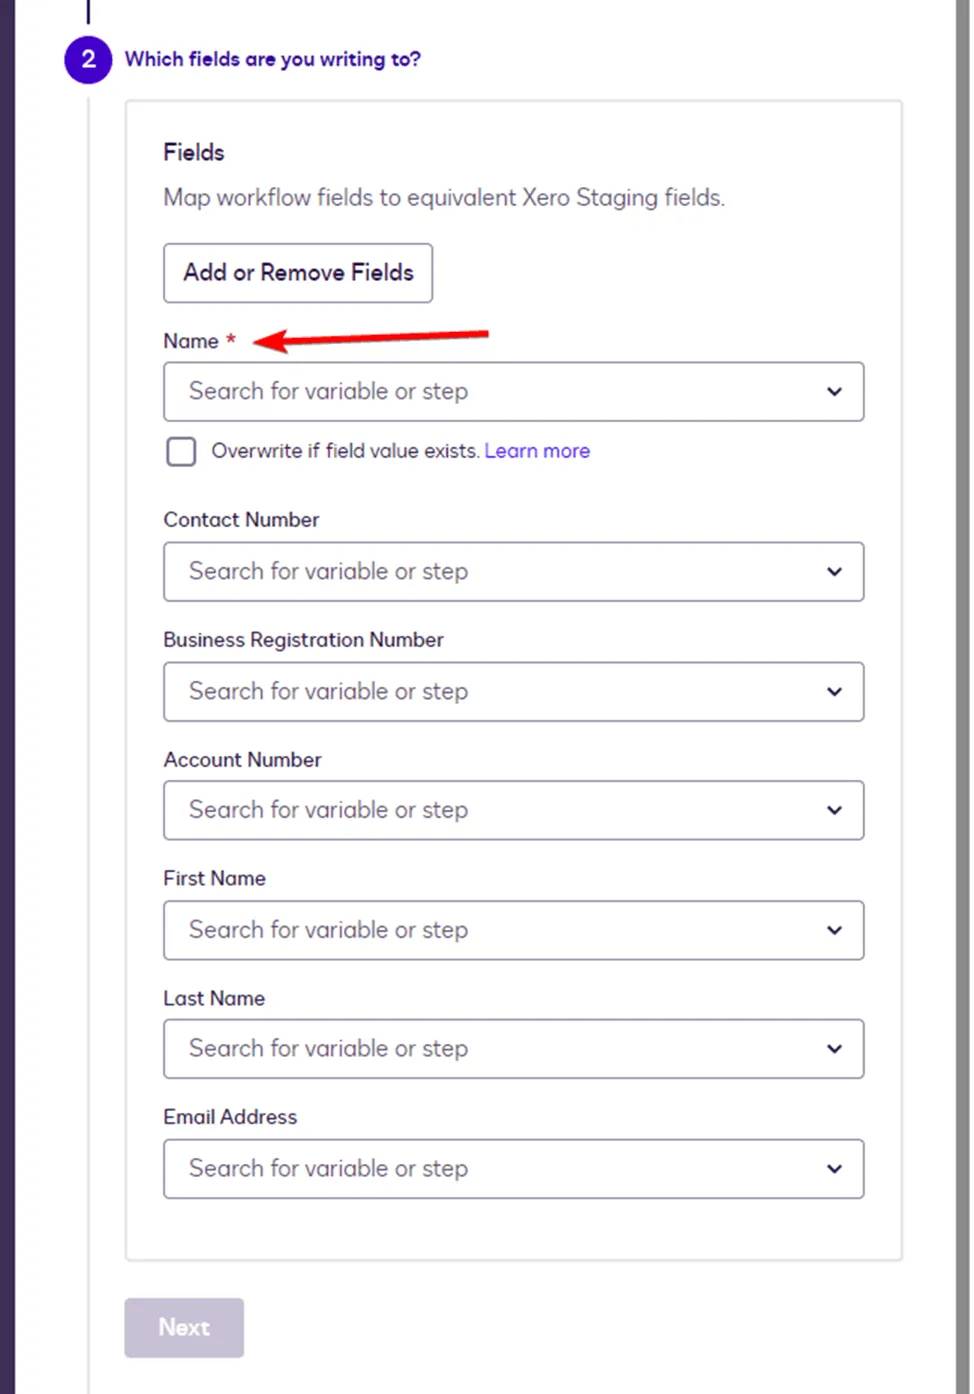
- Map Other Fields: Map any other data points you wish to update (e.g., Email, Phone).
- Click Next.
5. Identify the Record
Finally, you must define the rule for identifying which record to write to.
Configure the rule as follows:
- Xero Field: Select Name (since it's the API key field).
- Operator: Select
Equal to. - Workflow Field: Select the corresponding workflow variable that contains the Name (e.g.,
Namefrom your Web Form).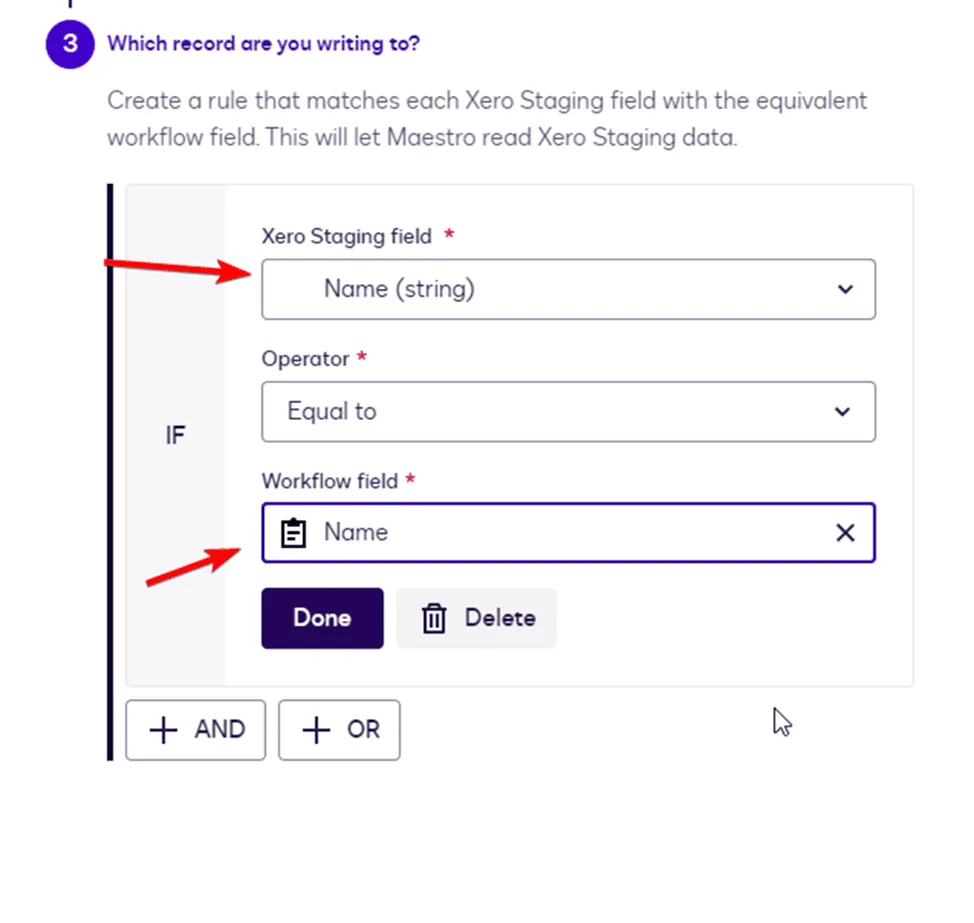
Click Done. The step is now configured to automatically update or create Xero records when the workflow runs.
5. File Upload to Xero
The File Upload action allows a Workflow to upload and attach a file to a Xero Contact.
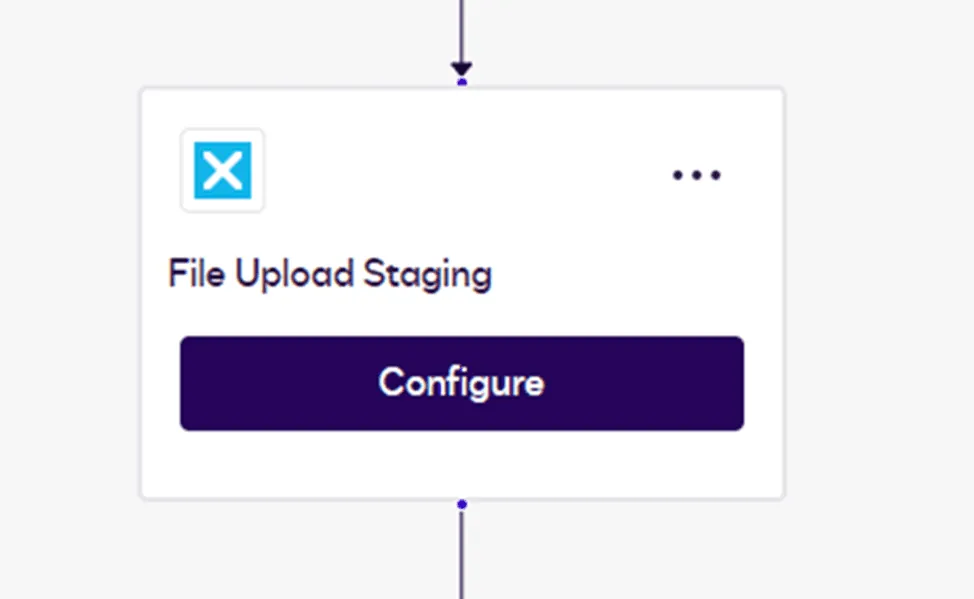
1. Add the File Upload Step
Add the File Upload to Xero action to your Workflow and open its configuration.
2. Select the File to Upload
You need to specify which file from the workflow should be uploaded.
Select File: Choose Combined Envelope File (or another file variable generated by previous steps).
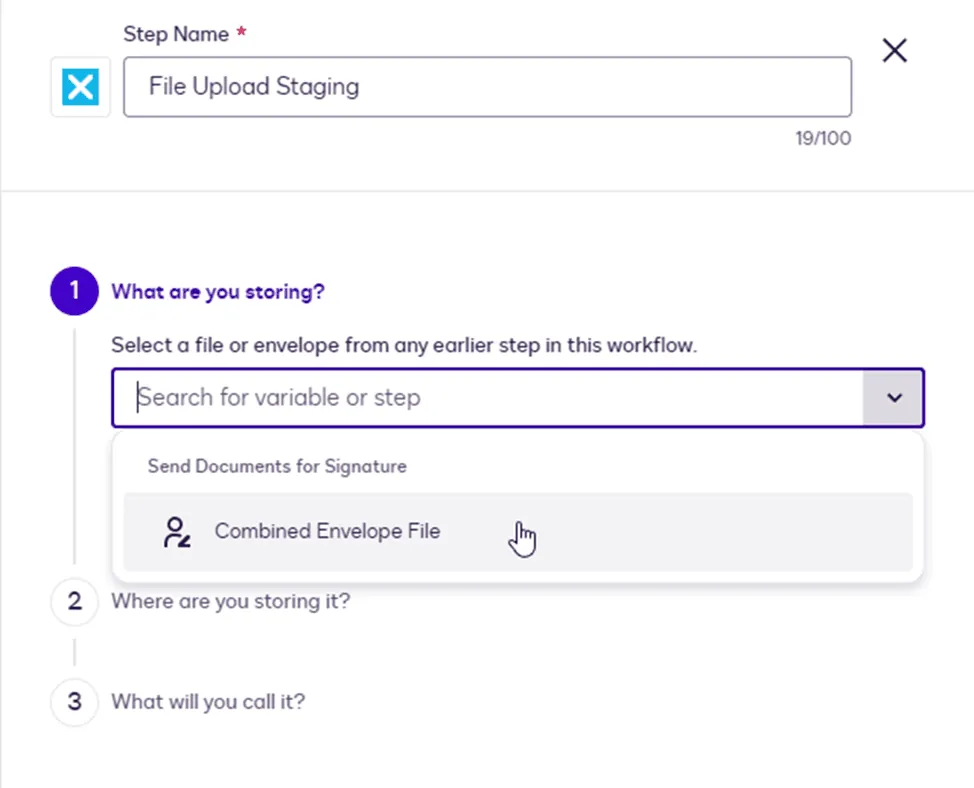
💡 Note: If no file is available for selection, it usually means that the file was not generated in previous workflow steps. Verify that your workflow includes steps such as document preparation and signing before File Upload.
3. Choose the Upload Location
⚠️ Important: The UI uses standard "Folder/Subfolder" terminology, but in the context of Xero, this structure represents the Xero Entity Hierarchy.
To attach a file, you must first select the Drive as Contacts. Then, for the Folder, you have two ways to choose the destination:
Method A:
Select contact from List.

You can select a specific Contact manually from the dropdown list.
- Result: The file will always be attached to this specific Contact, regardless of who is processed in the workflow.
- Use case: Useful if you want all files to go to a single central record (e.g., a generic "Admin" contact).
Method B:
Attach to the Current Workflow Contact (Dynamic method).
You can configure the New Subfolder using a variable (Contact ID).
Please check below "How to configure" for more information.
- Result: The file will be attached to the specific contact involved in the current workflow run.
- Use case: Essential for universal workflows where you want the signed document to go to the correct client's record automatically.
How to configure Contact ID in New Subfolder:
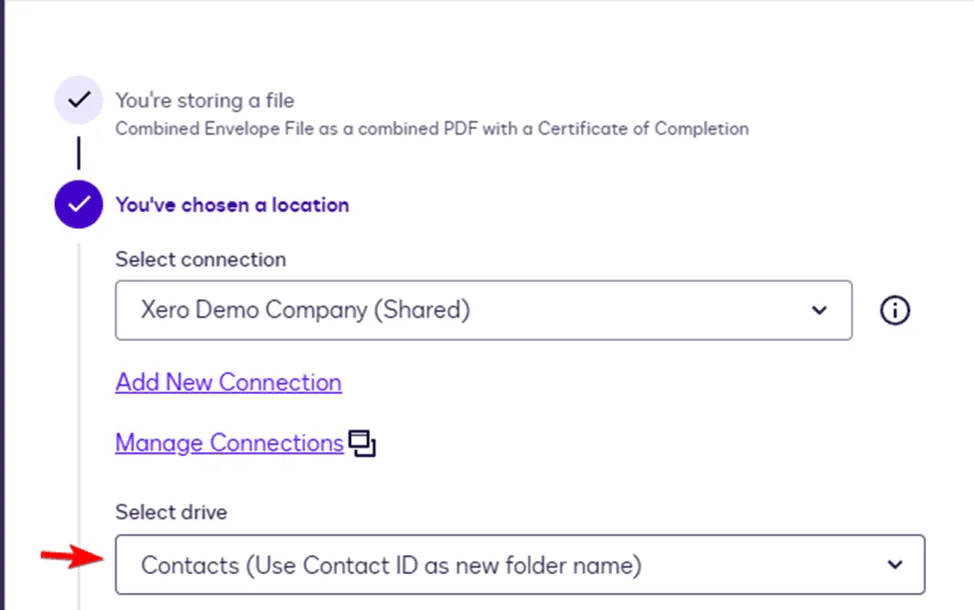
Step 1 — Select Drive In the Select Drive dropdown, choose Contacts.
This sets the target entity type for the upload.
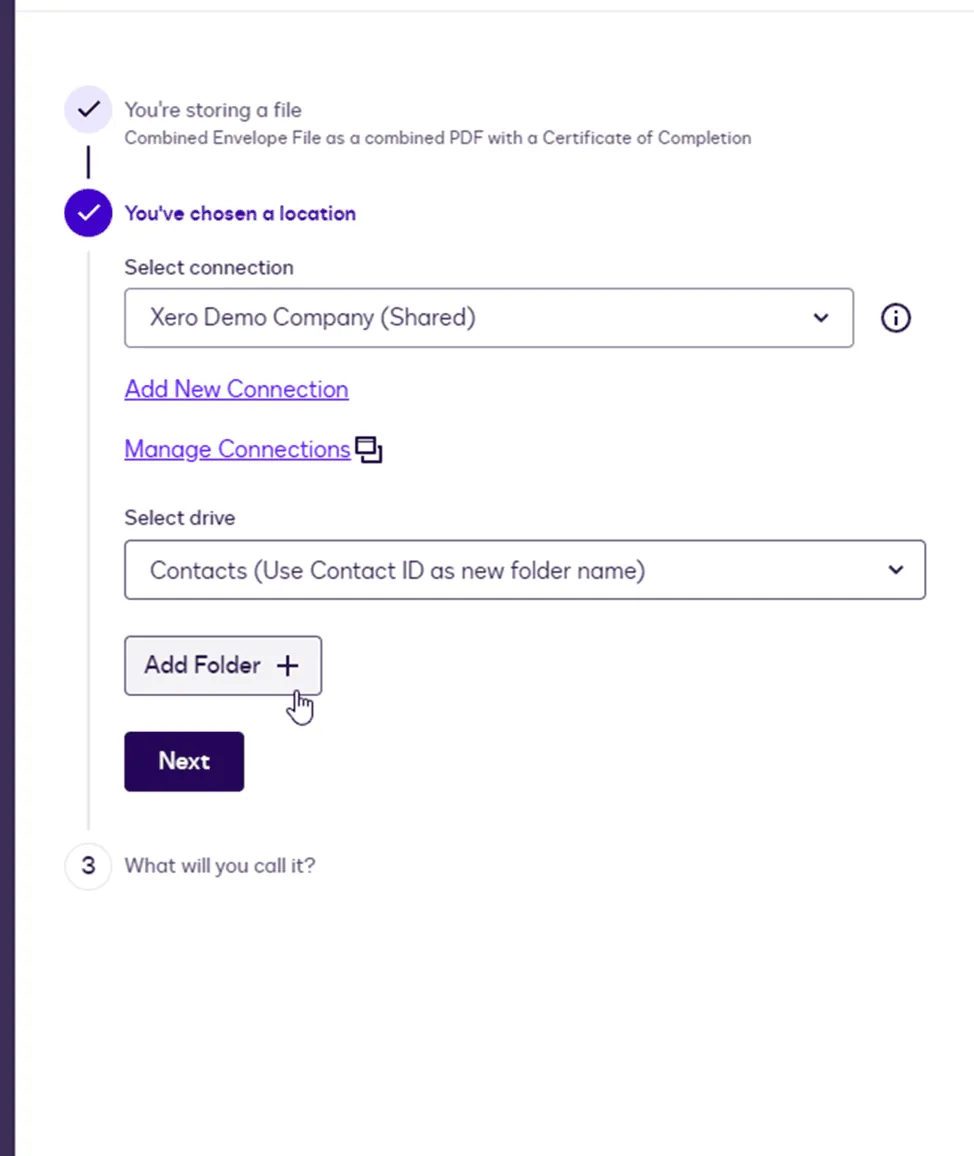
 Step 2 — Add Folder Variable
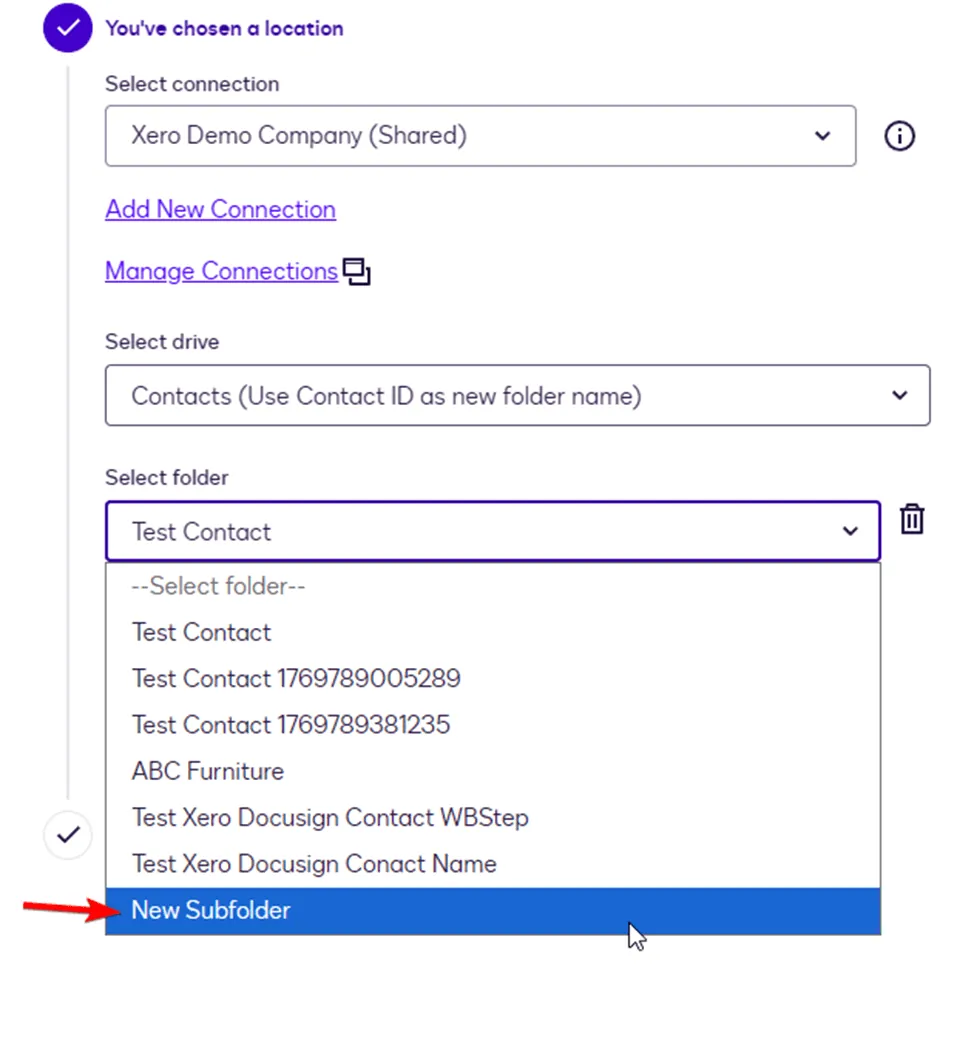
 Under Select Folder, click New Subfolder.
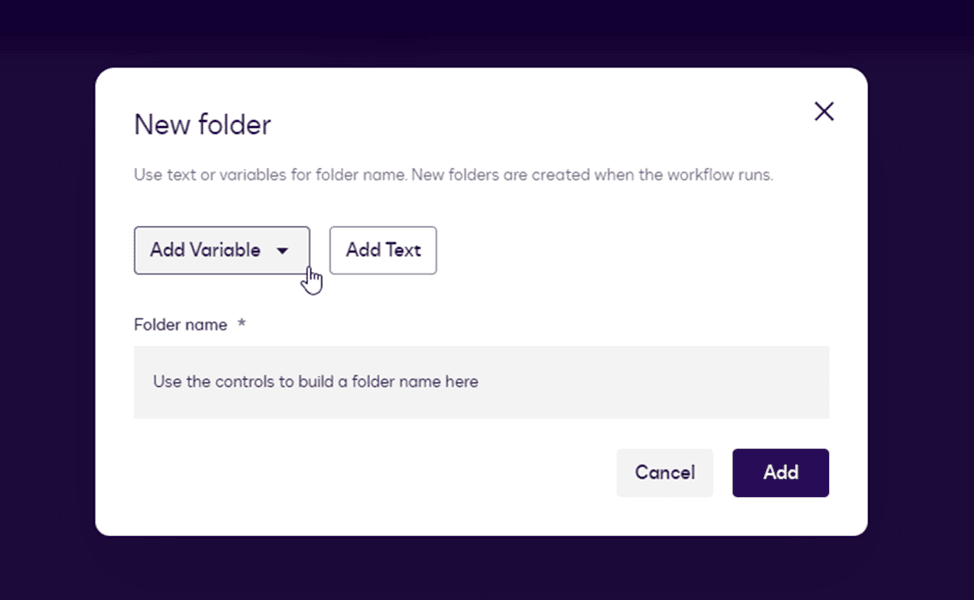
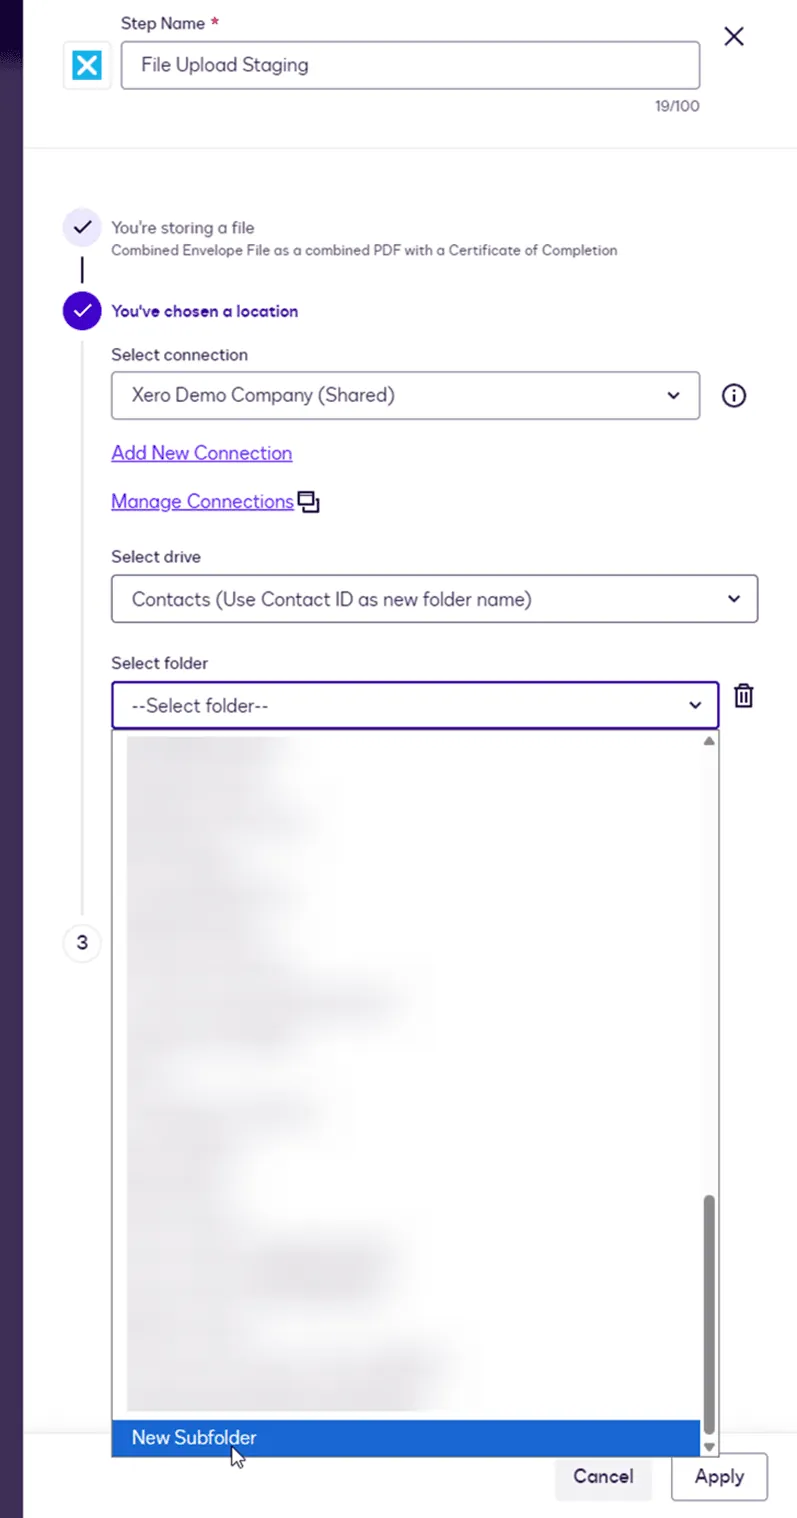 In the dialog (New Folder), click Add Variable.
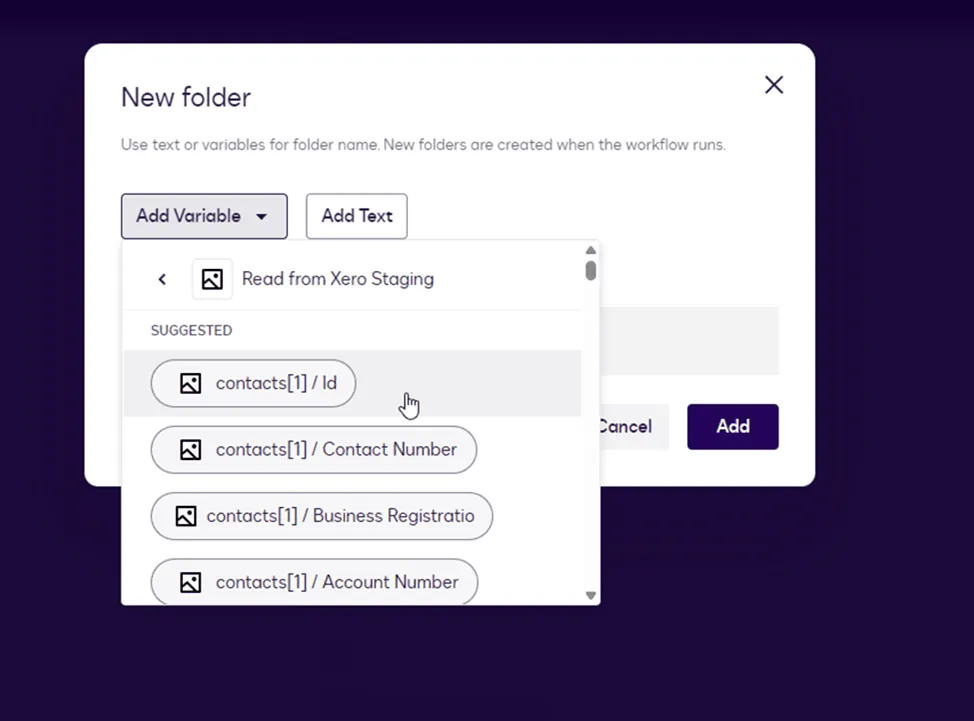
 Select the variable source. Remember, we should select Contact ID! You can receive it from the Xero Read step.
Choose: ID.
Select the variable source. Remember, we should select Contact ID! You can receive it from the Xero Read step.
Choose: ID.
 Click Add.
![New folder modal with 'contacts[/]/id' in folder name field and 'Add' button.](/images/documentation/xero-for-docusign/2298919a63ceb4f765a38adc1ddaee66.webp) ✅ Result: The Folder entry will appear in the File Upload location UI and will contain the ID variable.
✅ Result: The Folder entry will appear in the File Upload location UI and will contain the ID variable.
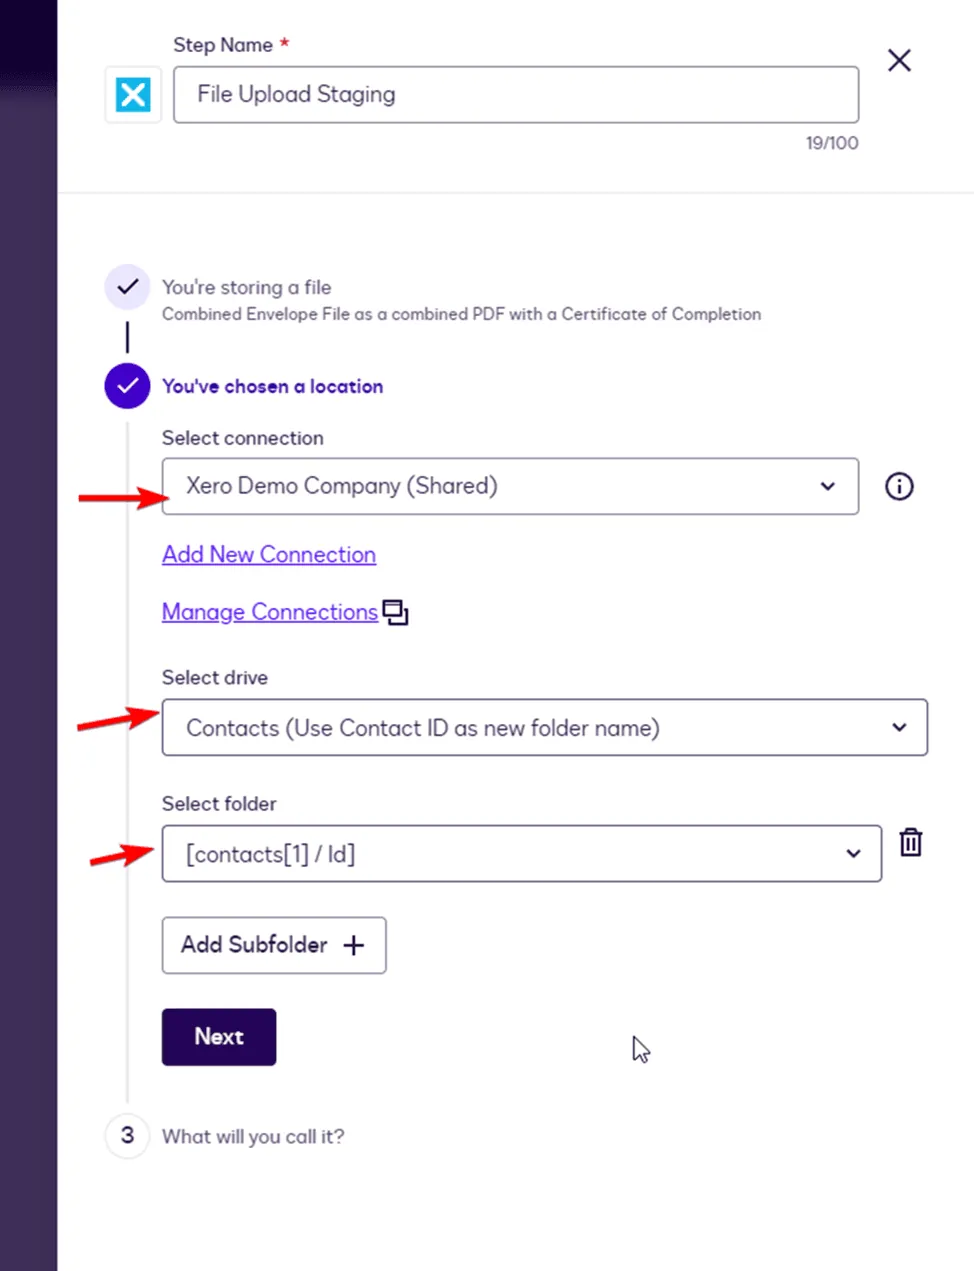
![User interface for selecting drive 'Contacts' and folder '[contacts[1]/id]' with red arrows.](/images/documentation/xero-for-docusign/67e8d8bfca3e37c06b44e90250fb7c0e.webp)
Final Expected Structure
After completing the steps above, your File Upload location should look like:
- Drive: Contacts
- Folder:
[contacts[1] / Id]
This configuration attaches the uploaded file to the specified Contact.
4. Name the File
- Click Next.
- File Name: You can combine text with variables from previous steps to create a custom file name (e.g.,
[Contact Number] - W-9 Form).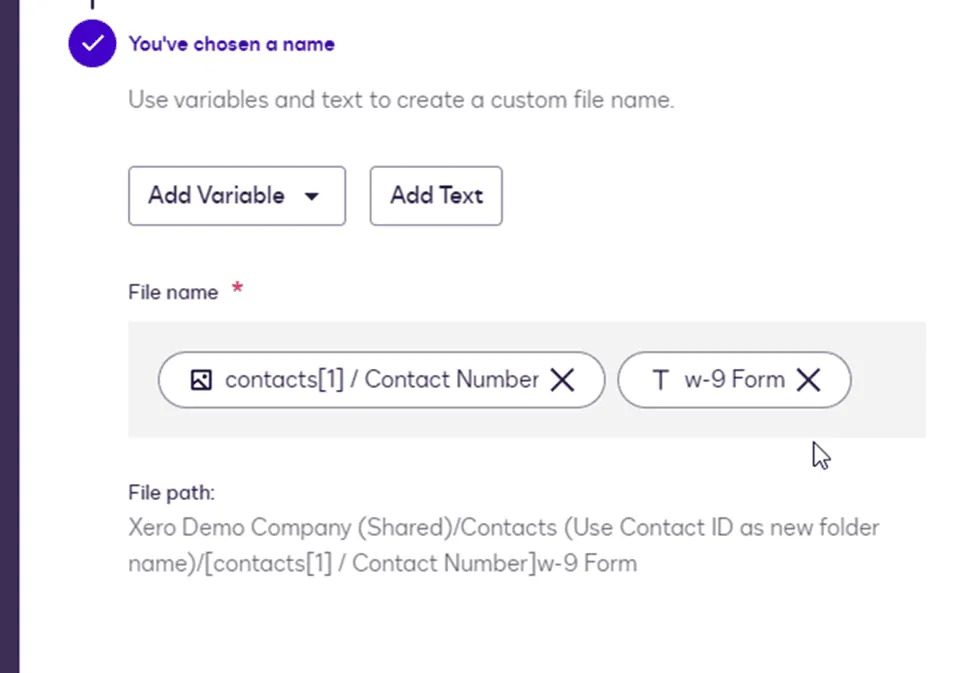
- Click Save.
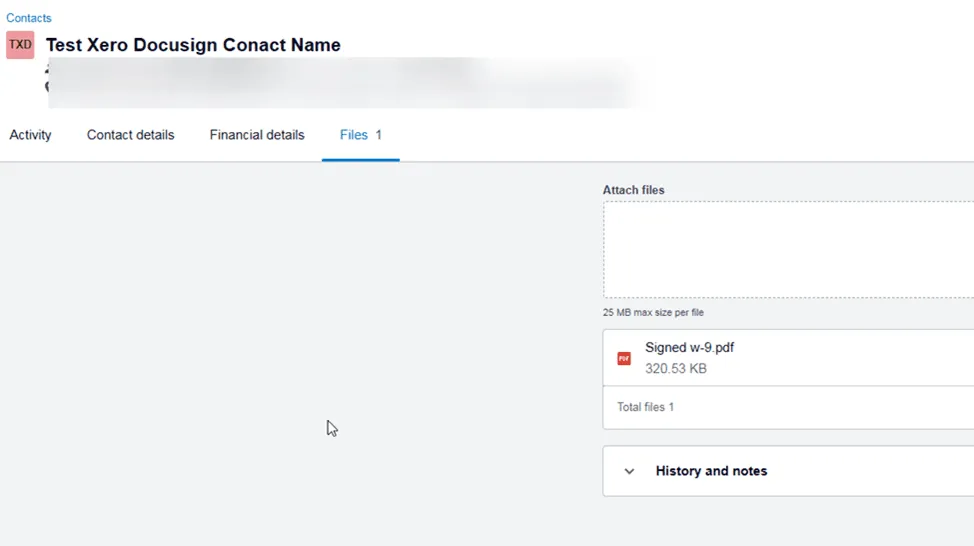
5. Verification
If everything is set up correctly, the file will be attached to the selected contact ID.
- Open the Contact in Xero.
- Navigate to the Files tab to see the uploaded document.
FAQ & Troubleshooting
Here are the most common configuration issues and how to resolve them.
File Upload Issues
Q: Why must I use the "Contact ID" for the Folder name?
A: The Xero API requires a unique identifier to attach files to specific records. Names are not reliable because they can be duplicates. You must map the Folder to the ID variable (retrieved from the "Read from Xero" step). If you use a static text name for the folder, the upload will fail or go to the wrong location.
Q: I don't see any files available in the "Select File" dropdown.
A: This usually happens if the upload step is placed incorrectly in the workflow.
- Cause: The workflow hasn't generated a file yet at this stage.
- Solution: Ensure that a "Sign Document" step exists before the File Upload step .