Send an offer letter from Lever and file the signed copy
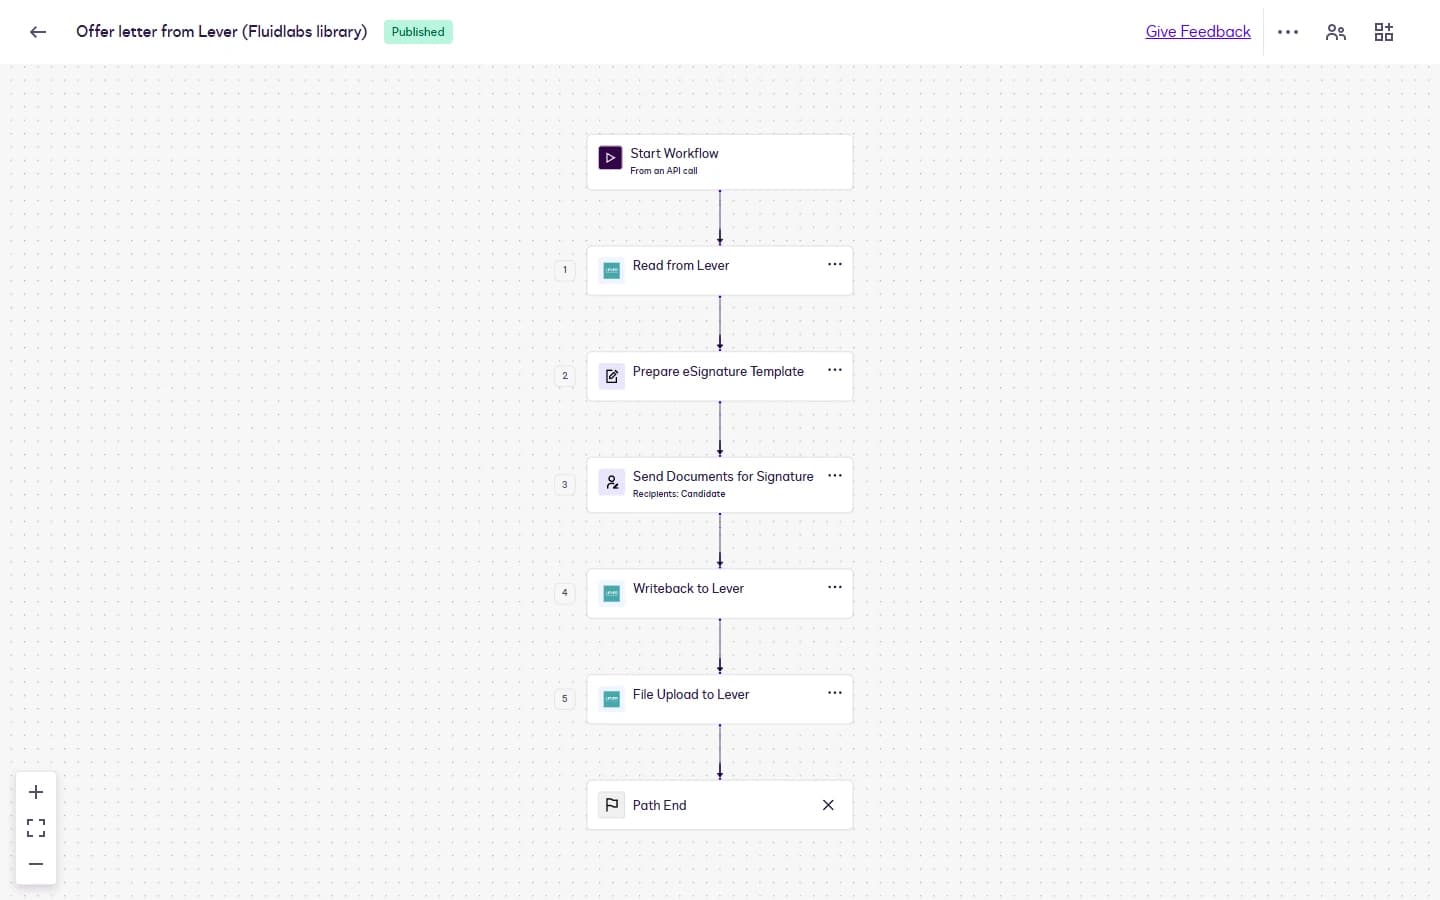
The workflow reads the candidate from Lever, fills the offer letter, and sends it to the candidate for signature. Once the candidate signs, it moves them to the Offer stage, adds the tag Offer signed, and files the signed letter on their profile.
- Starts
- From an API call or by hand
- Steps
- 5
- Document
- Offer letter, 1 page
- Signers
- The candidate
- Last test run
- 16 October 2026
What it does
- Start: Start WorkflowFrom an API call, or Run Workflow by hand. Inputs: candidateId, jobTitle, offerStartDate, baseSalary.
- 1Read from LeverCandidate where Record ID equals candidateId: Name, First Email, Location, and Job Posting Title, which the letter does not use.
- 2Prepare eSignature TemplateThe offer letter template, with its six data labels mapped.
- 3Send Documents for SignatureTo the candidate, with the subject "Please sign: your offer letter".
- 4Writeback to LeverCandidate update: Stage becomes Offer, and the tag Offer signed is added.
- 5File Upload to LeverThe signed letter on the candidate's Files, as Signed Offer Letter.
Field map
| Data label on the offer letter | Lever field | Step |
|---|---|---|
Candidate_Name | Candidate / Name | 1 |
Candidate_Email | Candidate / First Email | 1 |
Job_Title | Start input jobTitle | Start |
Work_Location | Candidate / Location | 1 |
Start_Date | Start input offerStartDate | Start |
Base_Salary | Start input baseSalary | Start |
Written back: Stage = Offer; Tags = Offer signed
Filed to: Candidates / {Record ID} / Signed Offer Letter
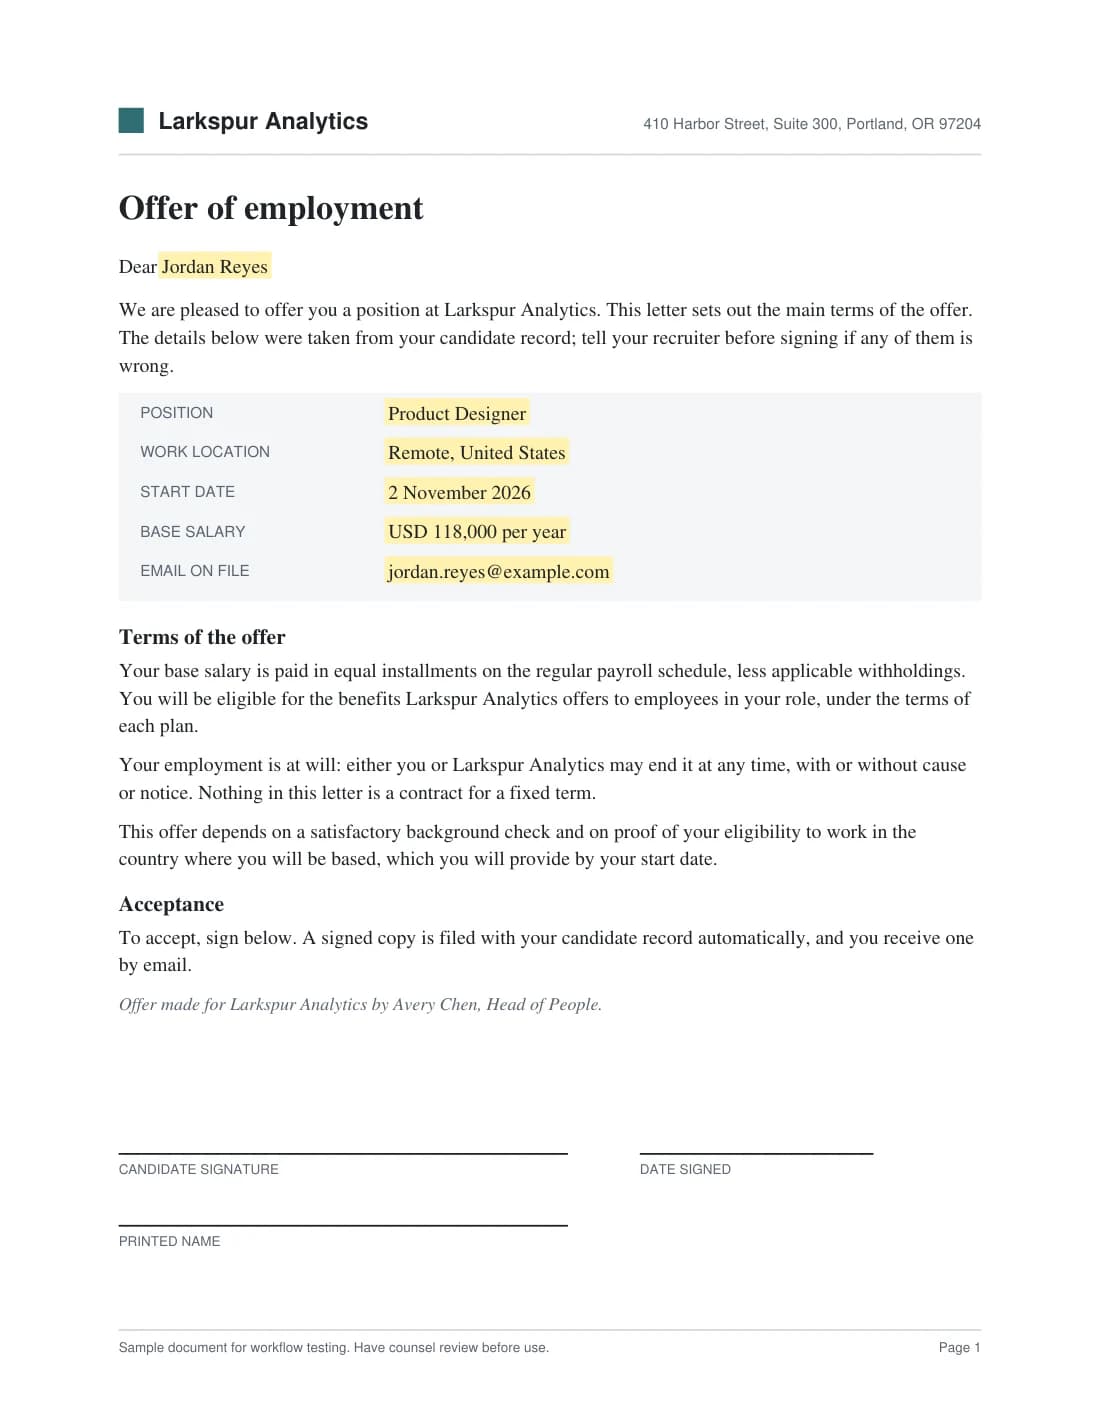
An offer letter that fills itself
The highlighted fields are the offer letter's data labels, shown here with sample values. The field map lists where each one comes from in Lever or the start inputs. Each field sits on a hidden anchor tag, so you can use your own offer letter: keep the six data labels and the workflow keeps working.
Set it up
Install and connect the app
Install Lever for Docusign IAM from the Docusign App Center and connect it to your Lever account. An account admin does this once.
Import the workflow
In Docusign, go to Agreements, Workflows, Create Workflow, then Import Workflow, and pick the .zip. When it asks, pick your Lever connection.
Review each step
The import creates the offer letter template in your account and fills the steps. Check the template mapping on Prepare eSignature Template, then publish.
Test with a sample record
Run it once on a test record addressed to your own inbox, and check the write-back and the file.
Make it yours
- Change the file name in File Upload to Lever. It is Signed Offer Letter by default, and you can add a variable such as the candidate's name.
- Move the candidate to another stage, or add another tag, by changing the Writeback to Lever step. The stage name must match your Lever pipeline exactly.
Questions
Can I use my own offer letter?
Yes. Upload your letter as an eSignature template, place the six data labels on it, and choose it in the Prepare eSignature Template step, then map the fields again.
The import says an app linked to a workflow step is missing.
Install and connect Lever for Docusign IAM first, then import the .zip again. Docusign does not name the missing app in that message.
Who starts the workflow?
A recruiter can run it by hand with the candidate's record ID, the job title, the start date and the salary. Another system can start it through the API with the same four inputs, for example with Baton.
Why do I type the job title?
In our tests, Read from Lever returned Job Posting Title empty, so the letter takes the title as a start input, like the salary. Work location comes from the candidate's Location field in Lever. Set it before you send.
Need it to match your hiring process?
We adapt library workflows to your stages, approvals and documents, and build private apps when a system has no app yet.
Docusign is a trademark of Docusign, Inc. Lever for Docusign IAM is published by Fluidlabs. To ask us to remove a mark, email hello@fluidlabs.com.